Creating applicants manually


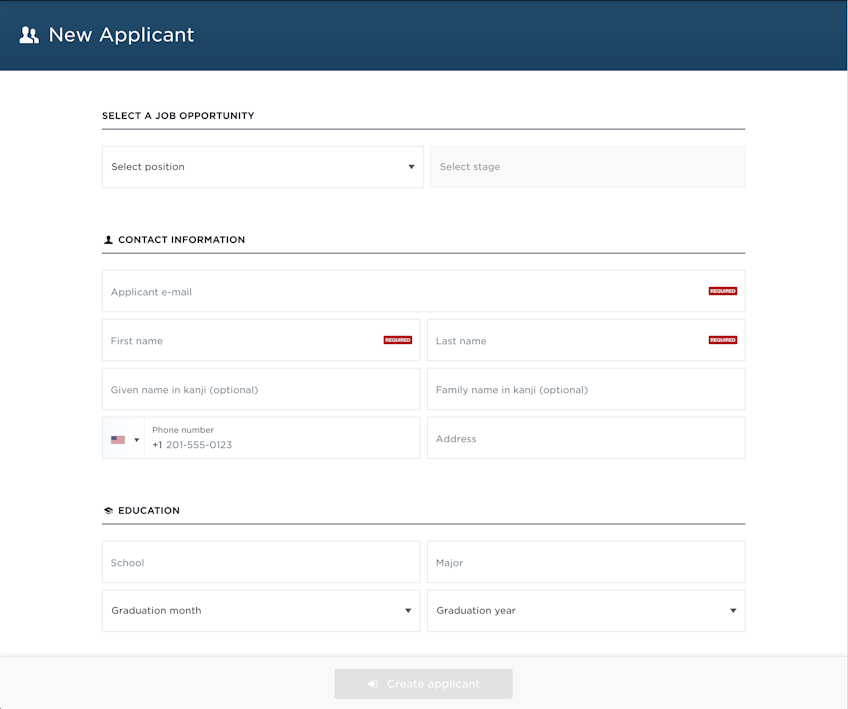
Under “Create applicant” you can fill in a few details to manually create applicants in the system.
You can find the link to the view in the toolbar in your applicants listing.
Fields
The required fields are e-mail and name. Any other information you fill out is optional.
Job posting (required)
Under “Select a job opportunity”, pick a position. Once you’ve selected the position you can pick the interview stage that the applicant should be in.
Note: If you pick “Video interview” as the stage, a video interview invitation will be sent immediately to the applicant’s e-mail address.
Contact information (required)
Under “Contact information”, fill in the applicant’s contact information:
- E-mail address — Required
- First and last name — Required
- Given and family name in Kanji — Optional
- Phone number — Optional
- Address — Optional
Work history (optional)
Add in the applicant’s optional work history; the companies they worked for, the positions they held and the timeline of their career.
Note: This section is only visible if you are adding an applicant to a Mid-career job posting.
Education (optional)
Under “Education” fill in the applicant’s optional school information.
- School — Optional
- Major — Optional
- Graduation year and month — Optional
Resume (optional)
You can upload a DOC or PDF resume for the applicant.
Source (optional)
You can select a channel where you got the applicant from, such as Facebook, Linkedin, Job board, etc.

